Saturday, December 24, 2011

Merry Christmas from the Haskins Family!!!


After waiting a few years for our cell phone contract to be up, we are happy to be owners of i-phones!  I still have so much to learn about all that it can do, but my son knew about an app called Mad Pad where you can record clips and put them together.  We try to do creative newsletters each year to share a bit about our year, so this seemed like a good idea!  We hope you enjoy it!

Merry Christmas and Happy New Year!


The $3.00 Boot Sock Project!


I saw a post on Facebook for a tutorial on making boot socks or leg warmers out of old sweaters.  I loved the idea and of course, couldn't wait to try it! 

I went to my fave thrift store here in Lincoln to find some sweaters to work with.  I chose a white sweater, black sweater and a black and white stripped tank sweater.  They were all only $1.00 each so I felt great about this project right away!


All who know me well know that I love black and white!
It is practical as it goes with so many outfits.


I started with the with cutting the sweaters using the sleeves as well as the
large area into as many pairs as possible.

My first try was with the black and white sweater.  

I cut it up and used as much of it as possible.

I used the trim and other scraps for flowers and ruffles.

I hate wasting anything!  I ended up using quite a lot of what I cut out.
You simply sew together the open edges to make a sock that can slip on over
your pant legs or leggings/tights.


Here's the pair with my Ugg-ish boots!

They also work well with zip-up boots!


The Boot socks completed!

Another pair in white with flowers made with scraps and a button in the center.

A pair in black with scraps from the black and white sweater that I
made into flowers and a green button in the center.

Here's a few more!  I am hoping to make my 14 year old niece
 very happy with some of these this Christmas!

Sunday, December 4, 2011

Set Design- Large Modern Trees needed!


Sometimes I get the opportunity to use my creativity in my full-time job at my church.  I would guess that most pastors don't "get crafty" too often, but one of the ministries that I over-see is our stage design ministry. 

We change the look of our stage for every message series which is a lot of work, but worth it for the atmosphere and "sacred space" that we create.

So, we are now in the Advent season and just started a new series.  We decided on a clean modern look on the stage with the 3 large modern looking trees off to one side.  Our friend, Scott Byers, has been creating our set design projects over this last year, but needed some help for this current set.  He made the tree bases (trunks) but needed some kind of trees to place on top of them.

I was up for the challenge and spent half a day coming up with a plan, getting supplies, and putting it all together.  Here is what I did:

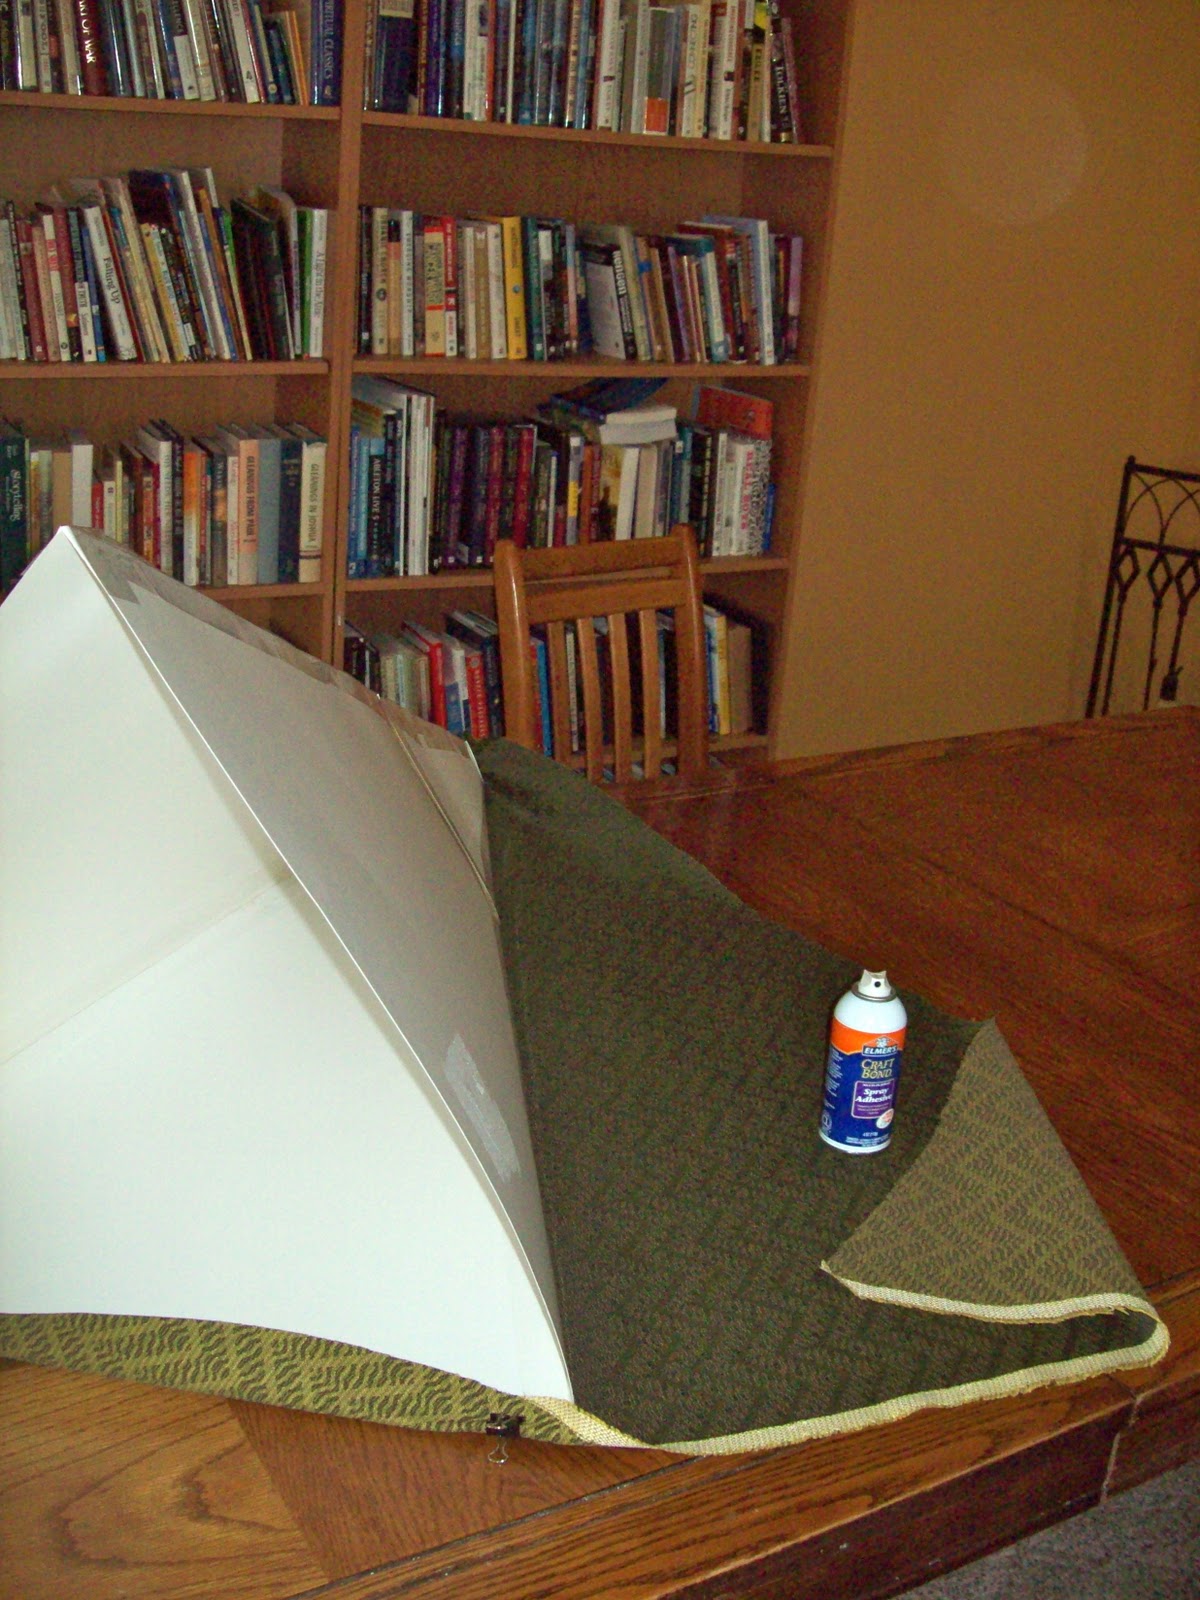
I decided to use the lampshade idea and create a "Tree Shade" using
 poster board as the base.  I wanted the trees to be big, so I simply
cut 3 pieces of poster board into a triangular pattern.

After cutting out the 3 triangular pieces, I attached them together
 with packaging tape on both sides.

I folded the two ends together and attached the ends
 with the tape to create a 3 sided triangular shade.


I wanted a taller tree with a smaller top, so I measured
from the top onto another piece of poster board to create
another 3 sided top.


Attach the two parts together and you have the structure of the tree.


Next, I attached the fabric with spray adhesive 
and hot glue.


The trunks needed a triangular piece of particle board
nailed to it so the flexible tree shade would stay in place 
and keep it's correct shape.


I was very pleased with how the three trees turned out and looked together!


 It was all worth it to see it come together and hear how others really enjoyed seeing it.  I love           
     celebrating the birth of Christ during Advent!  If you live in or near Lincoln, Ca., you should
     come see it for yourself at Emmaus Church Community!  Our church website is   


Tuesday, November 15, 2011

Give the Gift of Time and Presence!

The Christmas Activity Tree


Some of you have asked about this tradition of ours.  Well, here it is!
During November, I get out my calendar for December and plan a family activity for each day of December 1st through Christmas Day.  I write the activities down in a special secret calendar, so only my husband and I know the activities.  Then, I cut out little slips of paper and number them from 1-25.  I write down each activity on the appropriate slip and fold it and loop it before attaching to the tree, making sure the number is visible.  On December 1st, your children can take turns finding the number, taking it off the tree and seeing what the activity will be. Since we are all busy people, sometimes evenings are not good.  Some of our activities have been in the morning and have been 5 minutes long.  It should just work around your schedule and be something fun, memorable and/or inspirational for the Christmas season!  If you have to make changes, it is not hard to look in your calendar and change out a slip of paper to something else.  Here is a sample of some activities that our family has done in the past:

Make a Nativity scene out of pipe cleaners!


SNOWBALL FIGHT!  Beforehand, crumple up lots of newspaper
 into "snowballs"and gather them in large garbage bags.
Dump them out and let em' fly all over the house!

Make and decorate Christmas cookies!


Package up the cookies and deliver them to neighbors
with the whole family and wish them
a merry Christmas!


Get some new clay or play dough, go to your favorite
coffee shop and mold something together!


Choose a compassion plan or cause that your family will give to.
 Then come up with a plan to raise money for it.  We have had a
hot cocoa and hot cider stand out in our court and let people
 know to come by and get a drink for a good cause.

Attend a Christmas Eve church gathering together.

Go early to a donut shop and play your
favorite card game together!


Make a fort out of furniture and blankets
 and sleep in it together!


Other ideas we've done:

*Drive around neighborhoods with great Christmas lights
*Christmas Caroling with friends in a neighborhood
*Buy and wrap a present for a child in need
*Invite a family over for dinner and watch a Christmas movie
*Read a Christmas story and drink eggnog together
*Make up Christmas Mad Libs to Christmas songs

Have a fun and memorable Christmas season as you give presence to your family!


Saturday, November 12, 2011

The Flower Scarf Challenge!

I recently saw a scarf that grabbed my attention.  "Oh, I love those large fabric flowers!", I said out loud when I saw it.


Last night, I thought about that scarf again and remembered some old, thin, white fleece material crammed in the bottom of a bag of fabric scraps.  Even though it was late, I couldn't stop thinking of ways to make that amazing scarf.  I gave in, found the fleece and got started!


Here's what I decided to do:


I started by cutting a piece for the base about 
4 feet long and 6 inches wide.  


I cut the base piece in a scalloped pattern
all the way around.

I cut the remaining fleece into ten 1 1/2 inch
wide strips for making the flowers.


I took the strips, cut them in a scalloped pattern as well and formed them into circles starting
from the outside and working toward the middle.
I used hot glue to hold it together and then eventually
to attach it to the base.


My first idea was to fill up some of the space between flowers by
adding a tiny strip tied in a knot.  I ended up using hot glue to
attach the flowers to each other so that there were no gaps.


I love the way it turned out even though it was a
little different than what I had seen. So soft and cozy too!


Friday, November 4, 2011

The Plastic Cup Challenge!

 I have hundreds of tiny plastic cups.
 

A big box with these old cups were at my husband's work and were about to be thrown away when my husband said, "Wait!  My wife will figure out something crafty to do with these!"

The box has been in our garage for the last 4 weeks and I decided earlier that TONIGHT IS THE NIGHT!  I will figure out something to do with these cups!
Tri-Shade Garland Lights!


I must still be in "lamp shade mode" because my thoughts turned to making little chandeliers or tri-shades.  Since Christmas is coming and I want to decorate the house, I figured these tri-shades over Christmas lights would be perfect!

I still have left-over fabric from several other projects and hot glue, so basically
anything is possible, right?


Here's the process:


I cut my fabric in little rectangles (4 of them) instead
of doing a perfect pattern to cover the whole cup.
I used a glue stick to attached the pieces around the cup.


I made 3 of them to make a tri-shade.


I attached the 3 with hot glue both at the top and bottom.


I used several different fabrics.


After the tri-shades were finished, I pushed the little white light through
the center of each tri-shade.    I added a red bow on the top of
the white light.


I love the look of all the fabrics together with the consistency
of the red bow on top to tie it all together!

I also like the look of all one fabric on every other light.


I love these!  Can't wait to start decorating for Christmas after Thanksgiving!

Thursday, November 3, 2011

Trash 2 Treasure - The Ugly Lamp Make-Over


It was an ugly pink and gold lamp.


My friend saw it on the side of the road with a sign that said "free" on it. She knows how much I like free stuff and how I like to decorate things, so she made me keep it! "Gotta come up with a great idea to transform it!"  I decided to get some help from friends on facebook and Pinterest!  Here's the post:


Ok, Pinterest friends and other creative friends, I have a challenge for you! My friend, Jill Loya, found this free pink lamp on the side of the road and gave it to me! I want to transform it from ugly pinkish-mauve/gold 80's lamp into something beautiful! Help me with your ideas!! Post your idea and even links and if I use your idea, I will send you a SB card! Ready, Set, Go!!!


I got some great ideas and links for its transformation.   My friend Tammy Lindstrom who knows me well gave me a great place to start, enticing me with a cute black and white colored lamp shade.  I decided to go with it as my inspiration!  


Here's my lamp's transformation process from ugly 80's to a modern beauty!
I started by removing the long pink
 plastic strip that wrapped around the
base of the shade. 

I decided to go with the same idea of wrapping
 a long strip of fabric around the base.  Since I had
short pieces, I hot glued the strips together.


After the wrapping of the strip was
complete, I added a black trim with
hot glue to the top and bottom
of the shade.


I made flowers out of fabric that I twisted
around and hot glued to the shade.


Then came the work on the base of the lamp.
 I took it apart and realized that I would not be
able to take it completely off of the cord. 

I did my best to tape of the cord with masking
 tape and cover areas with newspaper while
I spray painted others.  I chose white for the top
and bottom of the base.
I chose black for the middle of the base.

The end result!  A beautiful black and white lamp that matches the decor in my house!
What a fun challenge!